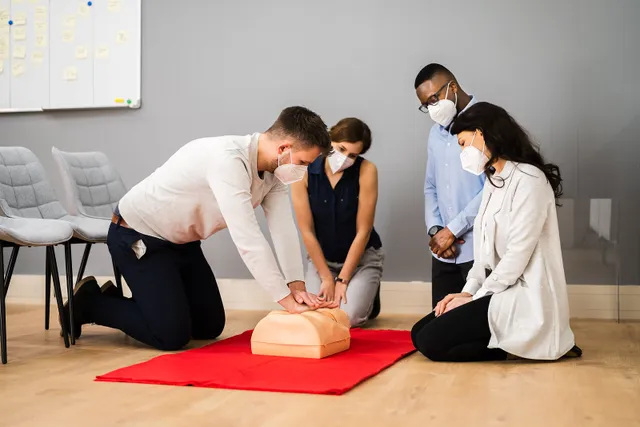
Imagine you’re in a situation wherein your friend or colleague suddenly collapses and stops breathing. Everyone around you panics, and there’s no one to help you. You know that every second counts, and the knowledge of cardiopulmonary resuscitation (CPR) suddenly seems valuable. CPR is a life-saving method that could help maintain blood flow and oxygen to crucial organs until professional medical help arrives. There are three kinds of CPR that you should know how to administer. In this blog, we will delve into those three types of CPR to help you understand when to use them so that you can know how to become CPR/AED certified and stay prepared for emergencies.
-
Conventional CPR
When to Use: Conventional CPR suits adults and older kids with cardiac arrest. This method includes chest compressions and rescue breaths.
Technique: Begin by putting your hands in the middle of the patient’s chest and compressing it at 100–120 compressions per minute. After 30 chest compressions, provide two rescue breaths by tilting the person’s head, pinching the nose, and giving a rescue breath every 6–8 seconds.
Benefits: Conventional CPR allows oxygen to circulate into the blood, reviving the person who has suffered from cardiac arrest.
2. Hands-Only CPR
When to Use: Hands-only CPR must be performed on adult victims of sudden cardiac arrest while you’re uncertain about your capability to carry out rescue breaths or the victim is unresponsive.
Technique: Begin putting your arms on the center of the patient’s chest and compress it at 100–120 compressions per minute. There are no rescue breaths needed for this approach.
Benefits: Hands-only CPR specializes in retaining blood flow and may be preferable for bystanders hesitant to give rescue breaths.
3. Pediatric CPR
When to Use: Pediatric CPR is tailored for toddlers and youngsters below 18 years of age. It is crucial when they suffer from cardiac arrest or breathing failure.
Technique: The method involves giving chest compressions and rescue breaths, which is slightly different from traditional CPR. For toddlers, use palms; for youngsters, use the heel of one hand for chest compressions. Provide rescue breaths according to the precise age requirements.
Benefits: Pediatric CPR recognizes the anatomical and physiological differences in toddlers, children, and infants. Adapting the method increases the probability of correctly reviving a younger victim.
Cardiopulmonary Resuscitation (CPR) is an essential life-saving technique used in emergencies when someone’s heartbeat or respiratory breathing stops.
What are the 7 steps to CPR?
Here are the seven essential steps to carry out effective CPR:
- Assess the Situation: Before starting CPR, ensure the scene is safe for you and the victim. Ensure there are no on-the-spot risks, including fireplace or site visitors that could damage you or the patient in need.
- Check Responsiveness: Gently tap the victim and shout, “Are you okay?” If they do not respond and are not breathing normally, administer CPR immediately. Ensure the victim is lying on their back on a firm, flat floor.
- Call for Help: If someone is nearby, train them to call 911 or your local emergency number immediately. If you’re alone, call for assistance and return to the victim to begin CPR. The quicker professional aid arrives, the higher the chances of survival.
- Open the Airway: To open the victim’s airway, tilt their head slightly by using one hand and lifting the chin with your other hand. It allows a clean passage for air.
- Check for Breathing: Lean close to the victim’s mouth and nose, searching for signs of breathing. Check for chest upward thrust and fall, concentrate for breath sounds and sense for breath for your cheek. If they are not breathing or breathing abnormally (gasping), it’s time to begin CPR.
- Begin Chest Compressions: Put the heel of one hand in the middle of the patient’s chest (generally below the nipple line) and place your other hand on top of the first hand. Interlock your fingers. Position your shoulders at once over your palms and use your body weight to supply rhythmic compressions. Compress the chest at 100-120 compressions per minute and allow the chest to completely draw back between compressions. The depth should be at least 2 inches (5 cm).
- Provide Rescue Breaths: After providing 30 chest compressions, give two rescue breaths. Ensure the victim’s airway is open and supply the breaths gently, watching for chest upward thrust. If the chest does not show upward thrust, reposition the head and attempt again. Maintain an adequate ratio of compressions to breaths (usually 30:2 for adults and kids) till medical assistance arrives or the victim shows signs of life.
Conclusion
In the face of a surprising cardiac arrest or respiratory failure, understanding which kind of CPR to provide can be the deciding element in saving a life. Remember, in any CPR scenario, the crucial intention is to provide blood flow to the body’s vital organs until medical assistance arrives. Proper training on life-saving strategies can make a massive difference in the outcome of an emergency. Take a CPR course and stay prepared to become a superhero in instances of disaster. You never understand when your brief movements may mean the savior to someone in need. Only when you become CPR/AED certified can you help someone in need.

